Xiaomi CR880x (M79) / CR8808 and AX3000 (M81) Firmware Collection

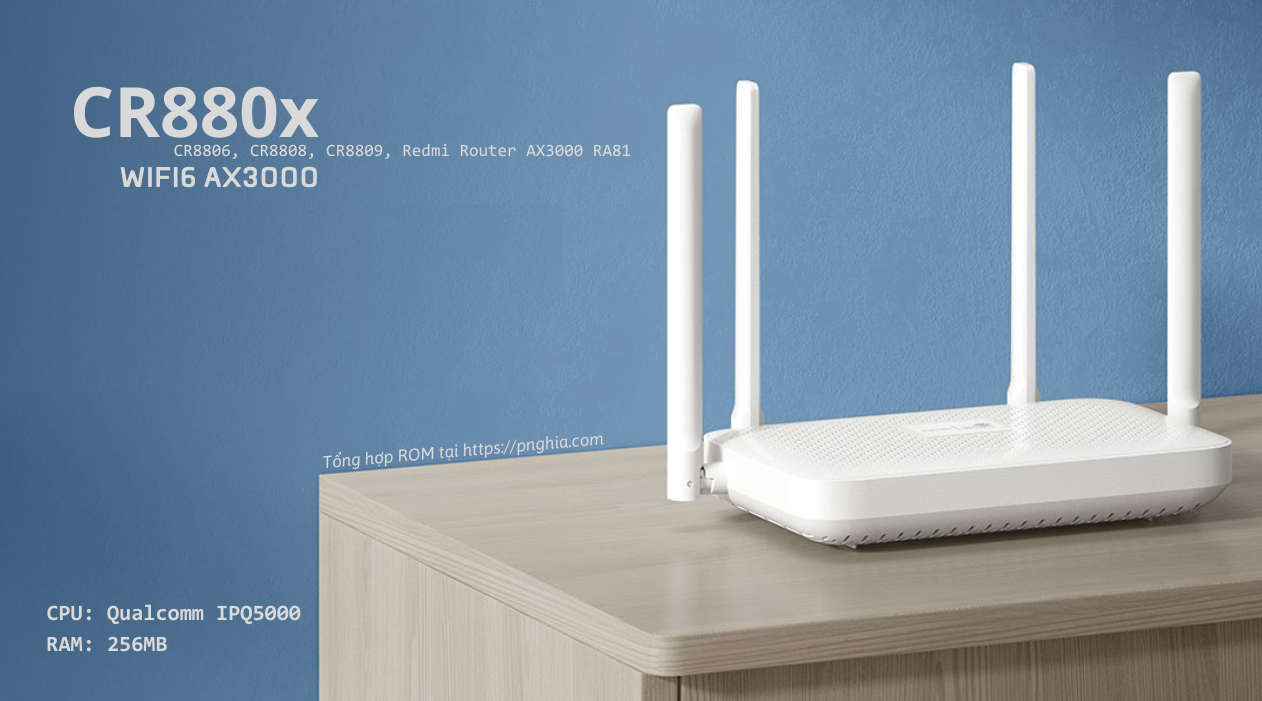
Xiaomi CR880x uses the carrier number as the suffix: CR8806 is China Unicom, CR8808 is China Mobile, and CR8809 is China Telecom. The main difference is that CR880x M79 uses the MXD7223 2.4GHz Wi-Fi FEM, while CR8808 M81 uses the RTC66266 FEM. They can use similar firmware and flashing methods.
CR8808 has two motherboard revisions, M79 and M81. M81 is essentially the same platform as the Redmi AX3000, so stock AX3000 firmware can be flashed without reduced signal performance. M79 is similar to 8806/8809 and is not fully compatible with stock AX3000 firmware because 2.4GHz cannot use the full range when the FEM lacks an integrated LNA.
Warning: These procedures are not for beginners. Following them means accepting the risk. I am not responsible for damage, although I will try to help if a problem occurs.
To identify M79 or M81, shine a flashlight at the upper-left corner of the motherboard.
Since October 2023, Xiaomi has started replacing CR880x hardware with a new revision. By 2024, most Vietnamese shops had received the new hardware; see the details of the new revision here.
📂 Overview / Specification ▼
- SoC/CPU: IPQ5000 dual-core 1GHz
- RAM: 256MB
- Flash/ROM: 128MB
- Ports: 4 Gigabit ports
- Wi-Fi: 2x2 2.4GHz 574Mbps (CR8806 FEM: MDX7223; CR8808 M81 FEM: RTC66266) / 2x2 5GHz (FEM: RTC66568) 2402Mbps
- Standards: IEEE 802.11 a/b/g/n/ac/ax, IEEE 802.3 3u/3ab
- Integrated features: MU-MIMO, Beamforming, BSS Coloring, WPA3, IPv6…
I. Connect UART and open the U-Boot console
- Prepare a USB-to-TTL adapter to read logs and access the U-Boot console. I use this FT232 adapter; connect only GND, RX, and TX. Do not connect VCC.
- If you need a router for practice, see Xiaomi CR880x on Shopee.
!!! Do not connect VCC. !!! Be extremely careful not to short GND-VCC or VCC-RX-TX. !!! A careless connection can send voltage directly into the CPU and kill it.
📂 UART wiring diagram ▼
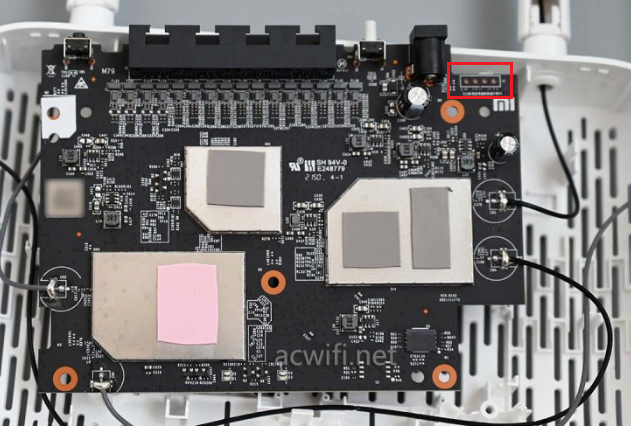
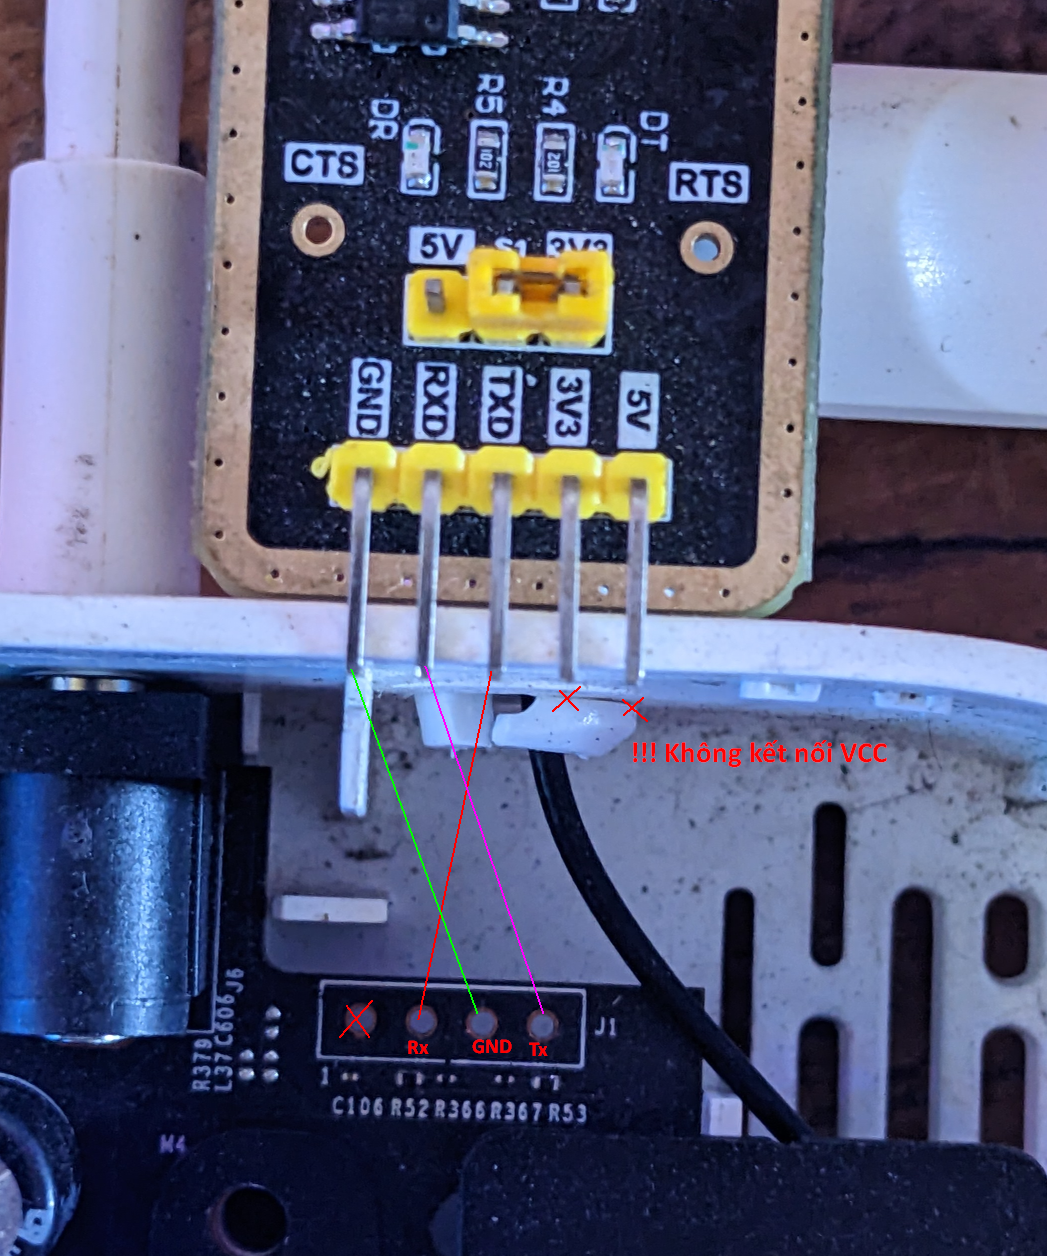
Before starting: after flashing with MiWifiRepair Tools, do not boot the router before connecting UART. If the router boots, it will disable UART automatically and you will need to flash again with MiWifiRepair Tools to reset it.
Download PuTTY and configure it as follows:
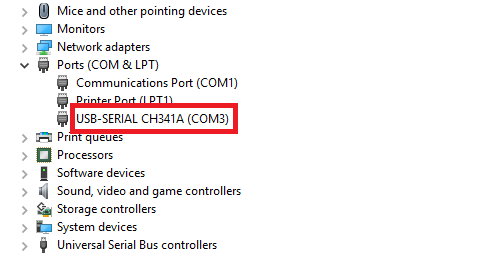
- Connect the USB-to-TTL adapter and identify its COM port.
- Open Device Manager, go to Ports (COM & LPT), and identify the port, for example COM3.
📂 Screenshot ▼
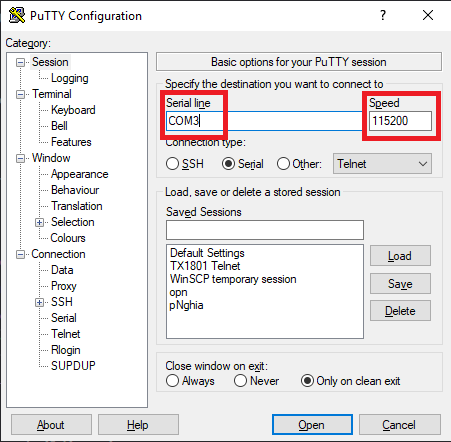
- Open PuTTY:
- Set Serial line to COM3, Speed to 115200, then click Open.
📂 Screenshot ▼
- Use Miwifi RepairTools (see the guide) to flash one of these firmware versions:
| Device | Download |
|---|---|
| Redmi AX3000 (1.0.62) | Official Xiaomi link / Mirror |
| CR8806 (6.2.33) | Official Xiaomi link / Mirror |
| CR8808 (6.2.11) | Official Xiaomi link / Mirror |
| CR8809 (6.2.136) | Official Xiaomi link / Mirror |
- The green LED flashes continuously when flashing succeeds.
- Unplug the power, reconnect it, and press Enter repeatedly to enter the U-Boot console.
- Run:
setenv boot_wait onsetenv uart_en 1saveenvUART is now enabled and firmware can be flashed through the UART console.
If you need replacement thermal material, see this thermal pad on Shopee. Measure the required thickness before applying it.
II. ROM collection and flashing guides
1. English stock ROM / AX3000 RA81 / Global RA82
Since October 2023, Xiaomi has been replacing CR880x with new hardware. Most Vietnamese shops had received the new revision by 2024; see the new hardware revision here.
- CR8806, CR8808, and AX3000 (RA81) have been English-localized and tested. The online flashing service mentioned in the original article is currently suspended.
- The tested ROMs were checked for Wi-Fi performance and have been used by many users without the signal loss associated with incompatible firmware.
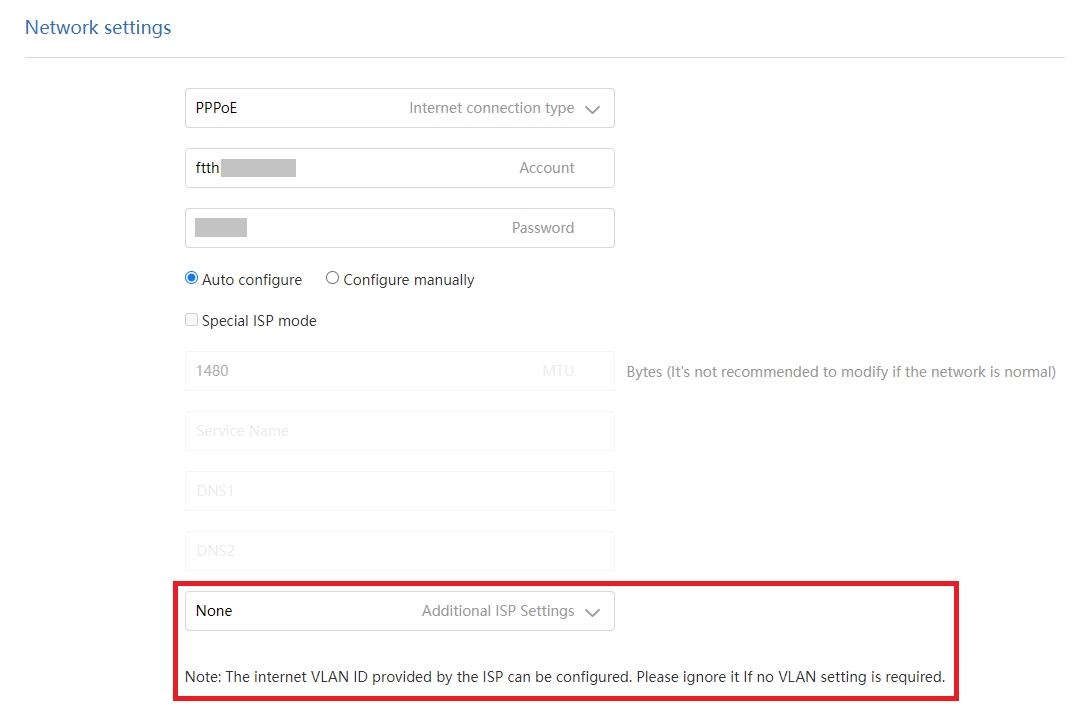
The global Xiaomi Mesh System AX3000 (RA82) can run on CR880x M79 and AX3000 M81 hardware and supports multiple languages, VLAN, PPPoE, and IPTV. Always verify the hardware revision before flashing.
📂 CR880x mesh test ▼
| Code | ROM | Meshed with | Status |
|---|---|---|---|
| CR880x | Redmi Router AX3000 RA81 | Xiaomi AX10000 | OK |
| CR880x | Redmi Router AX3000 RA81 | Xiaomi AX9000 | OK |
| CR880x | Redmi Router AX3000 RA81 | Xiaomi AX7000 | OK |
| CR880x | Redmi Router AX3000 RA81 | Xiaomi AX6000 | OK |
| CR880x | Redmi Router AX3000 RA81 | Xiaomi AX5400 | OK |
| CR880x | Redmi Router AX3000 RA81 | Xiaomi AIoT AX3600 | OK |
| CR880x | Redmi Router AX3000 RA81 | Redmi AX3000 | OK |
📂 Screenshots ▼
English Xiaomi Mesh System AX3000 ROM on CR880x and AX3000 RA81:
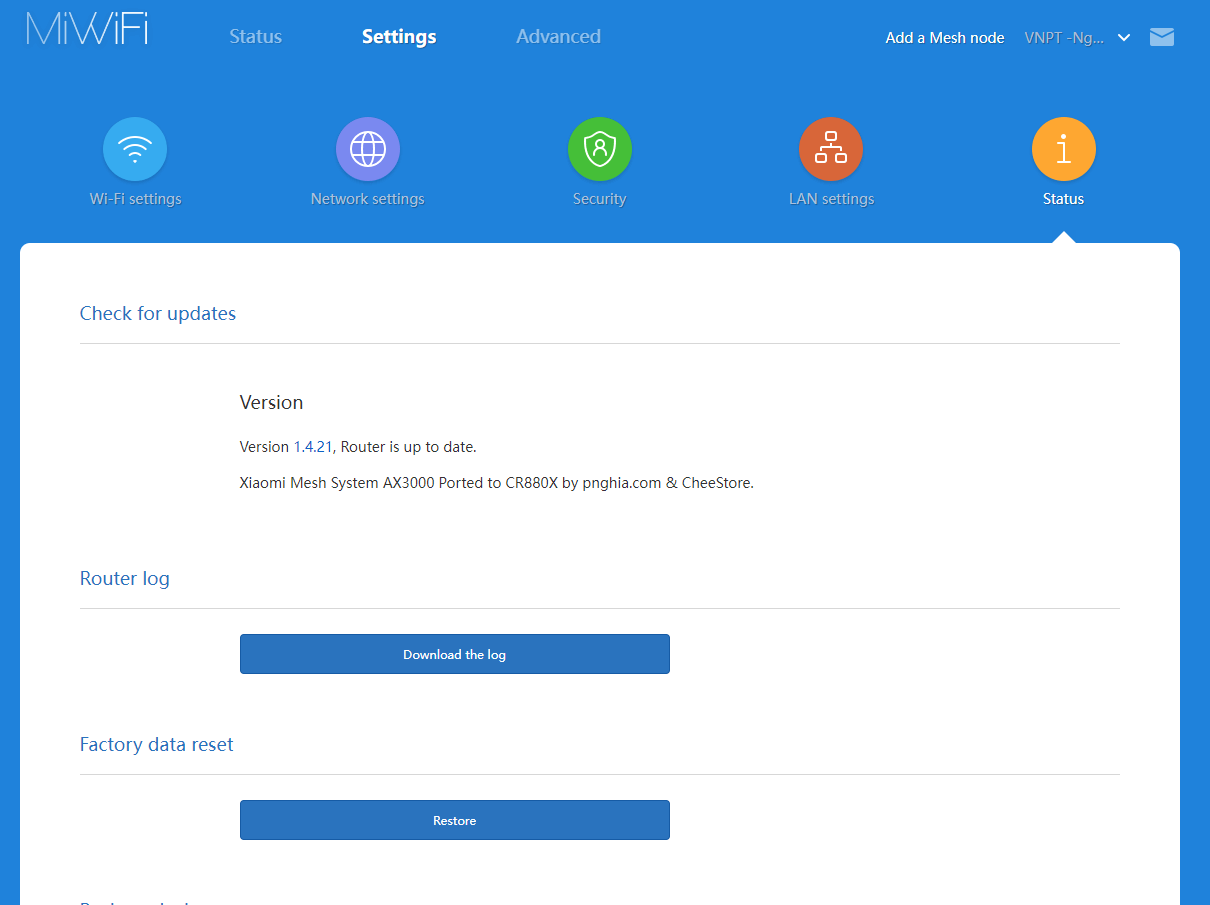
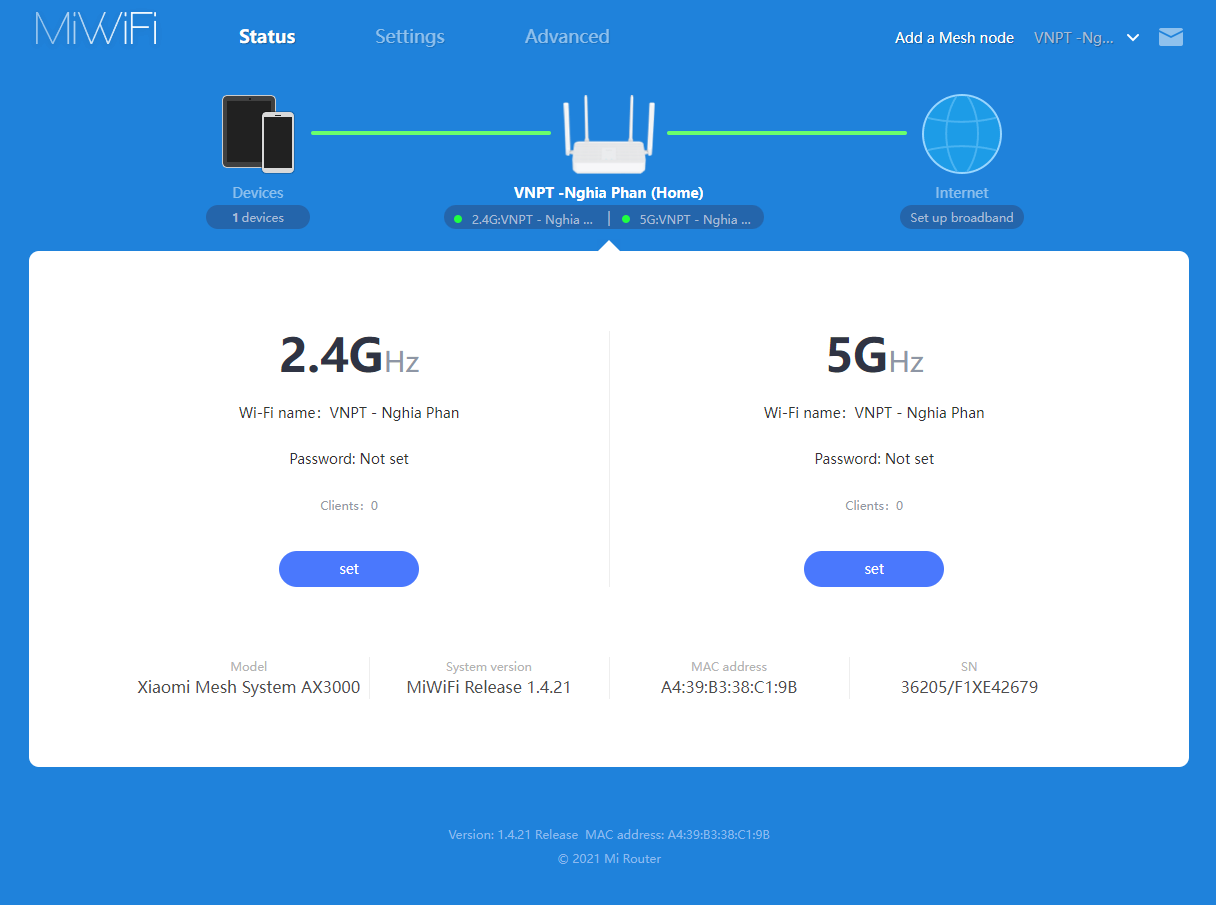 PPPoE with a VLAN ID on Xiaomi Mesh System AX3000:
 MI HOME recognizes it as Xiaomi Mesh System AX3000:
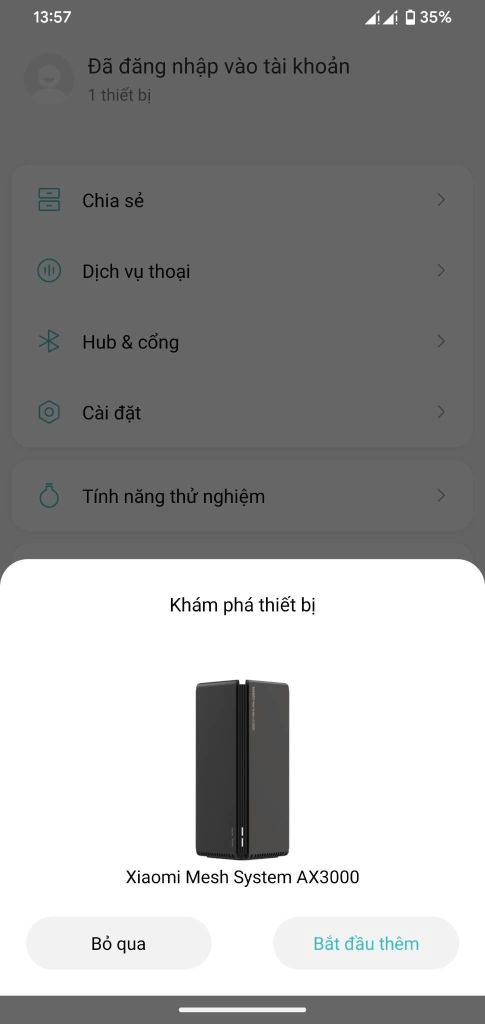
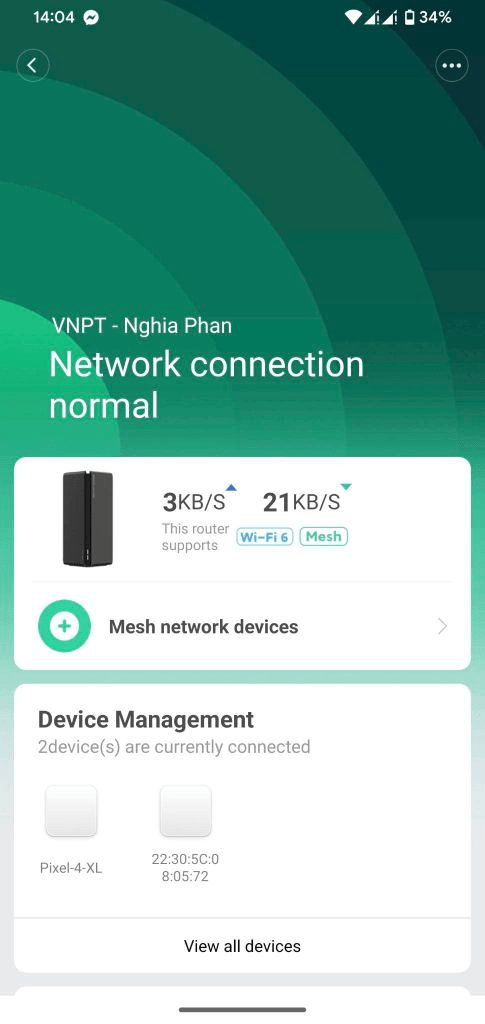
2. Stock ROM
Flash through the web interface or use MiWiFi RepairTools.
2.1 AX3000
| Version | Download |
|---|---|
| 1.0.33 | Xiaomi/Mirror |
| 1.0.52 | Xiaomi/Mirror |
| 1.0.62 | Xiaomi/Mirror |
| 1.0.68 | Xiaomi/Mirror |
2.2 CR8806
| Version | Download |
|---|---|
| 6.2.14 | Xiaomi/Mirror |
| 6.2.33 | Xiaomi/Mirror |
2.3 CR8808
| Version | Download |
|---|---|
| 6.2.11 | Xiaomi/Mirror |
| 6.2.147 | Xiaomi/Mirror |
| 6.2.220 | Xiaomi/Mirror |
2.4 CR8809
| Version | Download |
|---|---|
| 6.2.102 | Xiaomi/Mirror |
| 6.2.136 | Xiaomi/Mirror |
3. OpenWrt for CR880x (M79) / Redmi AX3000 (M81)
See the OpenWrt flashing guide.
3.1 Hzyitc build
- Visit hzyitc’s GitHub and download the newest build for CR880x/Redmi AX3000.
- The file is under Assets: openwrt-ipq50xx-generic-redmi_ax3000-squashfs-nand-factory.ubi.
The 160MHz channel requires Country Code = CN and Channel = 64. Wait about one minute for Wi-Fi to appear.
uci -q batch <<-EOF wireless.radio1.country='CN' wireless.radio1.htmode='HE160' wireless.radio1.channel='64'EOF3.2 Slienna build
See the details on GitHub.
Flashing is not for beginners. Make sure you understand each step. If necessary, I can flash the firmware for you; the fee is optional.
4. OpenWrt flashing guide
Choose one of the two OpenWrt versions, then configure a TFTP server.
- Download the newest Tftpd64 (for example, Tftpd64-4.64 for 64-bit Windows).
- In Windows, open Settings > Network and Internet > Change adapter options. Open the Ethernet adapter properties, then IPv4 properties, and set:
- IP address: 192.168.31.10
- Subnet mask: 255.255.255.0
- Default gateway: Leave empty.
📂 Screenshot ▼
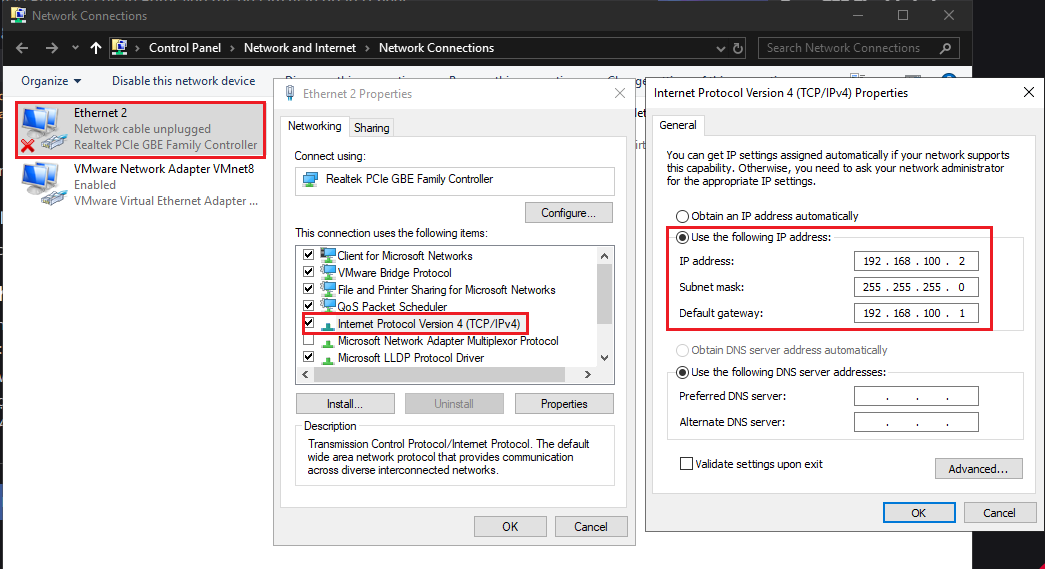
- Open Tftpd64, click Browse, and select the directory containing the downloaded OpenWrt firmware.
📂 Screenshot ▼
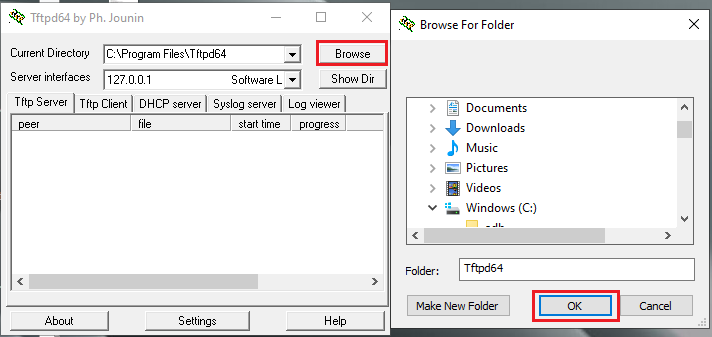
Flash OpenWrt
Connect UART and run:
# To avoid mistakes, click COPY to copy the commands.# Set the router IPsetenv ipaddr 192.168.31.100# Set the TFTP server IPsetenv serverip 192.168.31.10# Download firmware into RAM (change the filename if necessary)tftpboot openwrt-ipq50xx-generic-redmi_ax3000-squashfs-nand-factory.ubi# Flash partition 2flash rootfs_1setenv flag_try_sys2_failed 0setenv flag_boot_rootfs 1setenv flag_last_success 1saveenv# Or flash partition 1 if required#$ flash rootfs#$ setenv flag_try_sys1_failed 0#$ setenv flag_boot_rootfs 0#$ setenv flag_last_success 0#$ saveenv# RebootresetAfter reset, the router should boot into OpenWrt.
See the OpenWrt configuration guide series.
5. JIKEOS
This ROM is for AP use only; it cannot establish PPPoE.
| Type | Link |
|---|---|
| IMG | Original link |
| BIN | Original link (AP) Original link (Controller) |
GOOD LUCK. Leave questions or suggestions in the comments and I will help when possible.
Comments & Discussion
Share your thoughts, ask questions and feedback