How to Configure DDNS on OpenWrt

Many services provide DDNS, and each service has its own configuration and usage policy. This guide uses Cloudflare for a domain you already own and manage through Cloudflare. Other DDNS services follow a similar process.
I. Preparation
I.1 Install the required packages
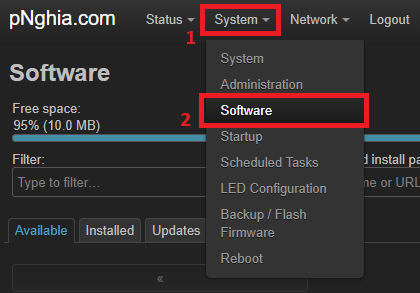
- Log in to the router and open System > Software.
📂 Screenshot ▼
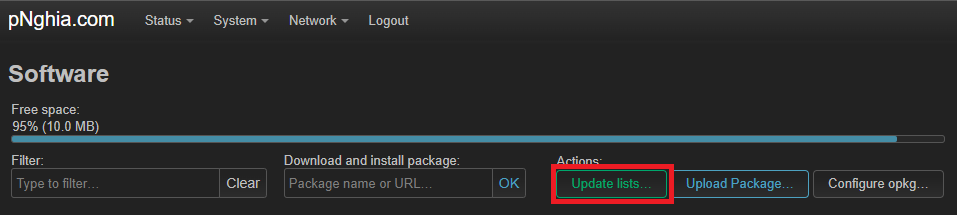
- Click Update Lists to refresh the package list.
📂 Screenshot ▼
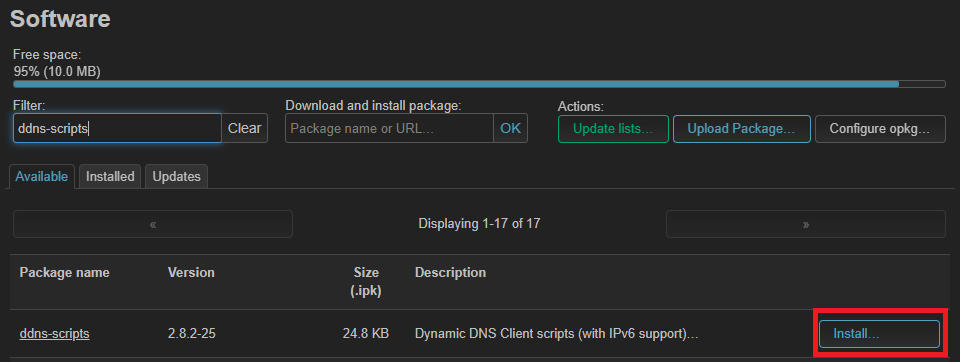
- Find and install ddns-scripts and luci-app-ddns.
📂 Screenshot ▼
For Cloudflare DDNS, also install ddns-scripts-cloudflare.
I.1.1 Configure Cloudflare DDNS
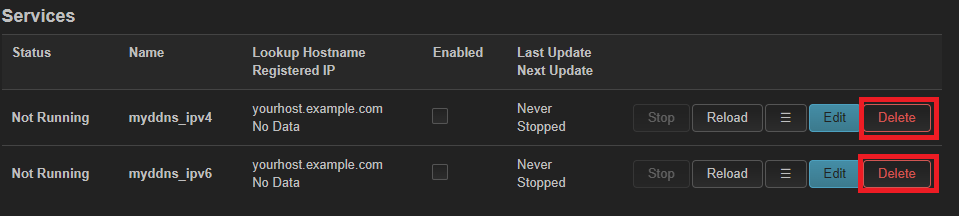
- Open Services > Dynamic DNS, remove the two default entries, and click Save & Apply.
📂 Screenshot ▼

- Click Add new service….
📂 Screenshot ▼
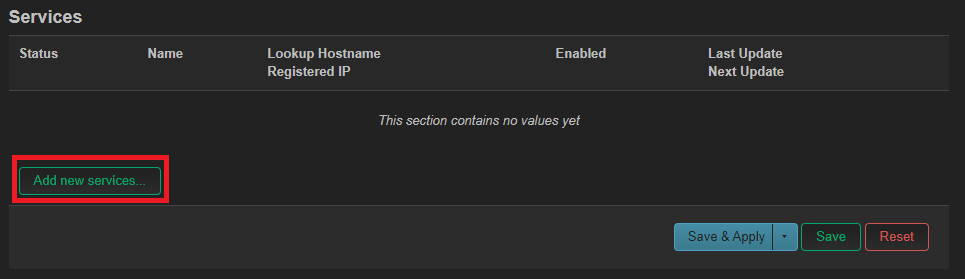
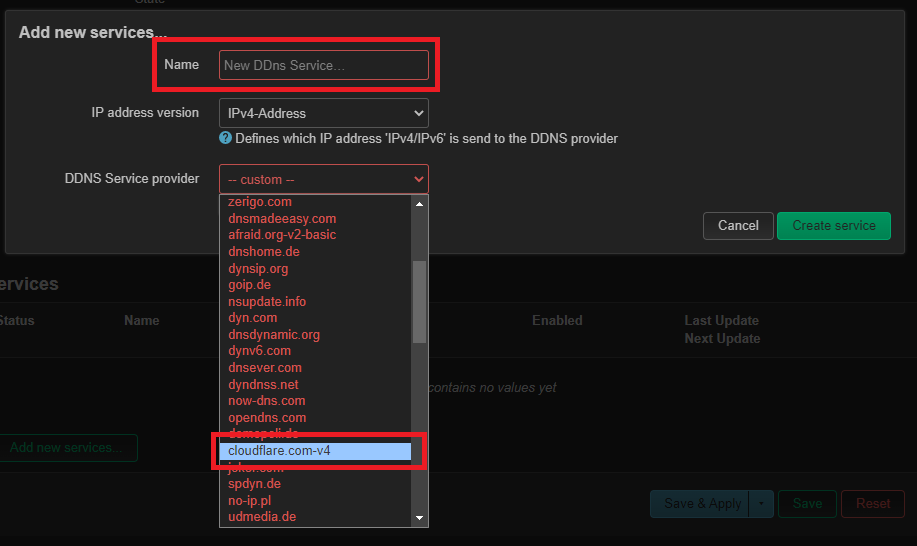
2.1. Enter any name and select Cloudflare.com-v4 as the DDNS Service provider.
📂 Screenshot ▼
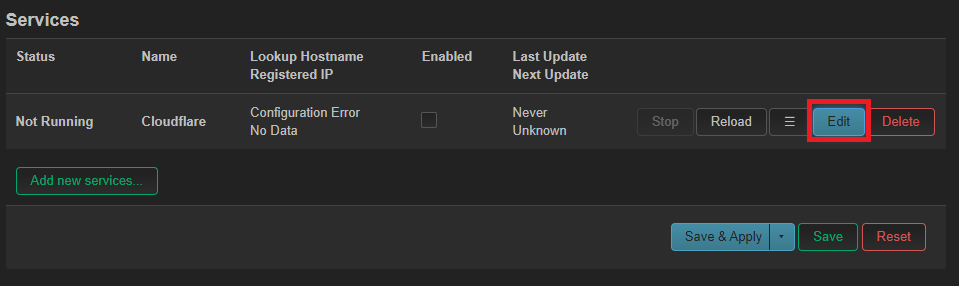
2.2. Click Create service, then Cancel to close the dialog. 3. Click Edit on the new service.
📂 Screenshot ▼
For Cloudflare, obtain the Global API Key using Cloudflare’s documentation.
In Basic Settings, enter:
| Lookup Hostname | tutorial.domain.ltd |
| Domain | [email protected] |
| Username | Your Cloudflare login email |
| Password | Global API Key |
| Path to CA-Certificate | /etc/ssl/certs |
In Advanced Settings:
| IP address source | Select URL | Select Network if the router dials PPPoE |
| URL to detect / Network | https://ifcfg.me/ip | Select wan when the source is Network |
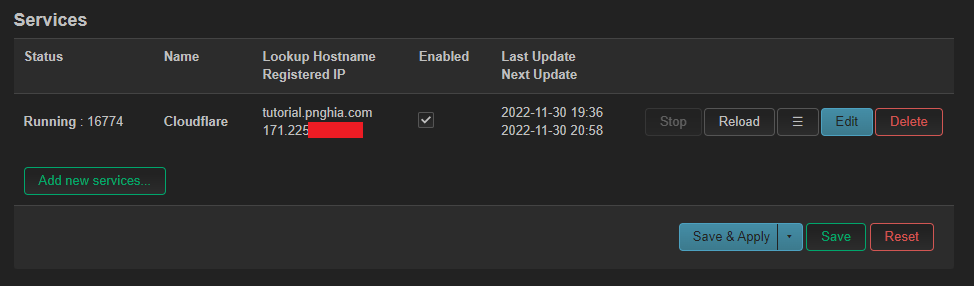
Click Save > Save & Apply, then click Reload to update the address.
To view the result, open Edit > Log File Viewer, click Read / Reread log file, and scroll to the bottom. A line such as Forced update successful - IP: '171.225.xxx.xxx' send indicates success.

The service checks and updates the address automatically at regular intervals.
📂 Screenshot ▼
I.1.2 Configure another DDNS provider
The following example uses DuckDNS.org.
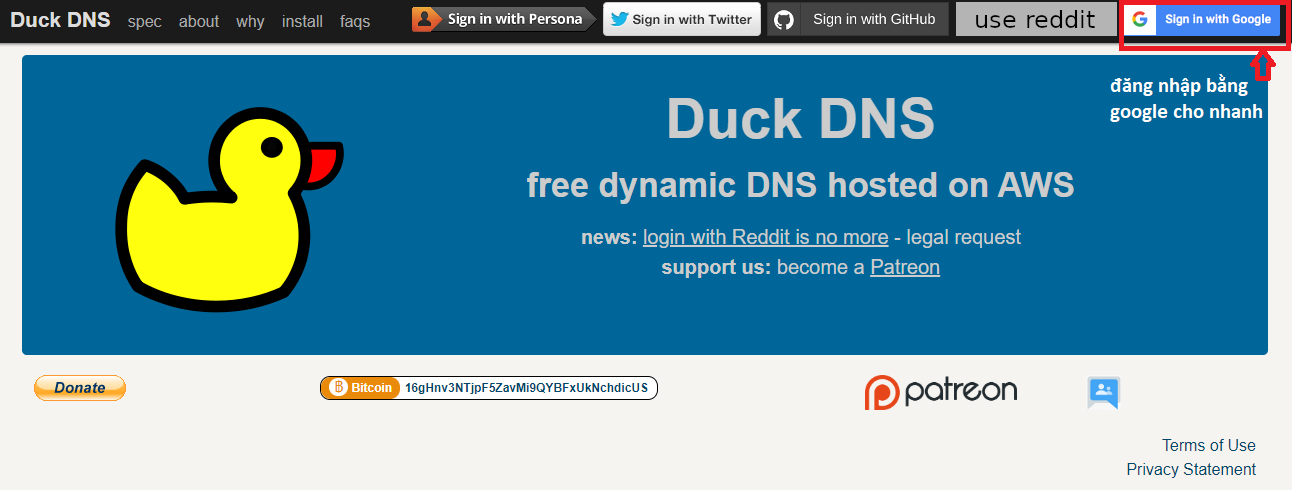
- Register for a free account at https://duckdns.org.
📂 Log in to DuckDNS ▼
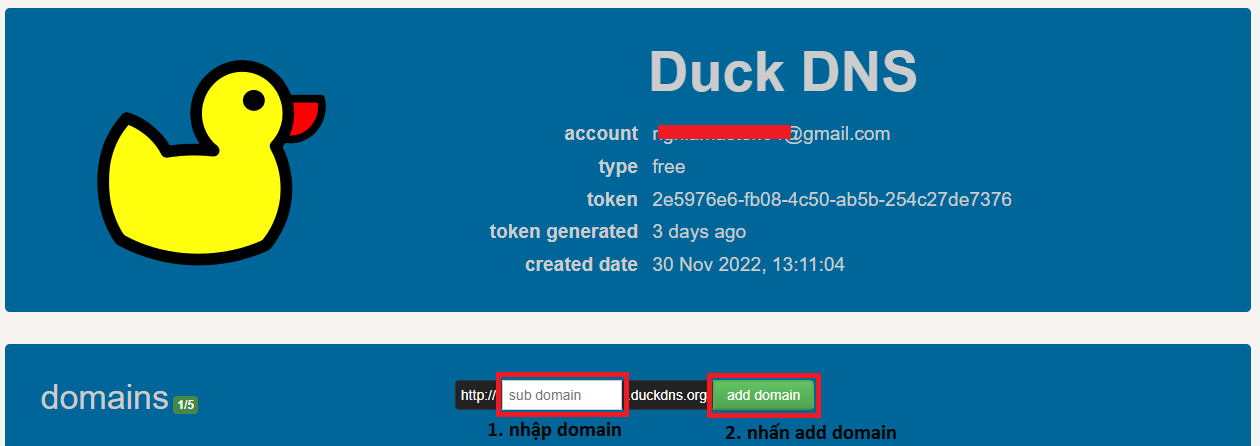
- Create a domain by entering its name and clicking add domain.
📂 Create a DuckDNS domain ▼
- Configure it in OpenWrt: 3.1. Open Services > Dynamic DNS, remove the default entries, and click Save & Apply.
📂 Screenshot ▼
3.2. Click Add new service….
📂 Screenshot ▼
3.3. Select DuckDNS as the provider. 3.4. Click Create service, then Cancel to close the dialog.
- Click Edit on the new service.
📂 Screenshot ▼
In Basic Settings:
|||
|-|-|-|
| Lookup Hostname | domain.duckdns.org | DuckDNS hostname |
| Domain | domain.duckdns.org | Use the subdomain.domain.tld form |
| Username | domain | Enter only the domain name, without .duckdns.org |
| Password | DuckDNS token | Get the token from the DuckDNS account |
| Path to CA-Certificate | /etc/ssl/certs | |
In Advanced Settings:
|||
|-|-|-|
| IP address source | Select URL | Select Network if the router dials PPPoE |
| URL to detect / Network | https://ifcfg.me/ip | Select wan when the source is Network |
- Click Save > Save & Apply.
- Click Reload to update the IP.
Other DDNS services can be configured in the same way; replace the domain, username, and password with values required by that provider.
Tutorials may have been written for older OpenWrt releases, so menu names can differ on newer versions. Check the current documentation if an option is missing.
Good luck!
Comments & Discussion
Share your thoughts, ask questions and feedback