

relayd is a last-resort way to turn an OpenWrt router into a Wi‑Fi extender when the main router does not run OpenWrt or does not support WDS/802.11s as needed. One radio provides a wireless uplink and another radio provides an AP for local clients; the relayd package provides bridge-like forwarding between the two sides.1
The source's example topology is:
- The main router is
192.168.1.1/24, with LAN serving clients and WAN reaching the Internet. - The extender has a separate management subnet,
192.168.2.0/24, for example LAN192.168.2.1. - The
wwaninterface connects wirelessly to the main router. - Clients behind the relay receive DHCP from the main network, while
192.168.2.1is used only to manage the extender.
Important: The two subnets must be different.
relaydis not a complete Layer 2 bridge and usually handles IPv4 only; DHCP, mDNS, and upstream performance may not behave like a wired bridge. When I control both devices, WDS or 802.11s remains the preferred choice.1
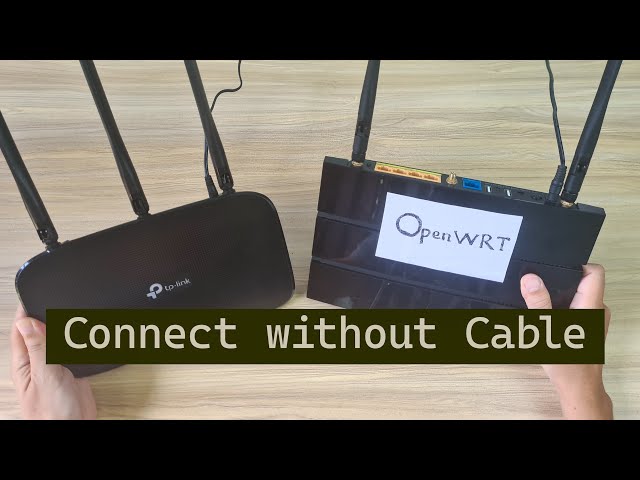
The source links a video showing substantially this procedure and notes that it was tested with OpenWrt 23.05.3 in June 2024.2
1. LuCI setup: change LAN first
During this procedure, keep the PC connected by Ethernet to a LAN port on the extender and temporarily remove any cable between the extender and the main router.
- Open LuCI at the default
192.168.1.1. - If needed, update the firmware in System → Backup/Flash Firmware, then choose Perform reset for a clean OpenWrt configuration.
- Open Network → Interfaces and click Edit for LAN.
- Change LAN protocol to static address, then click Change protocol.
- Assign an address in the extender's separate subnet, for example
192.168.2.1. - Click Save, then Save and Apply.
- Reconnect to
192.168.2.1. - In LAN, open the DHCP Server tab and disable DHCP with Ignore interface.
- In IPv6 Settings, set RA-Service and DHCPv6 Service to
disabled. - Click Save and Save and Apply.
- If LuCI is needed again, give the PC a static address such as
192.168.2.10/24with gateway192.168.2.1.
Do not connect the uplink to the main router while changing the LAN address. If LuCI disappears, return to Ethernet and the static PC address; this is the extender's important management backdoor.
2. Create the Wi‑Fi uplink
Choose a radio based on the environment: 5 GHz is usually faster, while 2.4 GHz usually reaches farther.
- Keep the PC connected to the extender over Ethernet.
- Open Network → Wireless.
- Choose the radio that will provide the uplink and click Scan.
- Select the main router's SSID and click Join Network.
- In Joining Network, set Name of new network to
wwan. - Enter the main router's WPA passphrase.
- Select the
lanfirewall zone as in the source relay procedure. - Click Save, then Save & Apply.
- In the client Wi‑Fi settings, set Mode to match the uplink:
Legacyfor Wi‑Fi g,Nfor Wi‑Fi n, and the corresponding mode for newer standards. - Set Width to the main router's channel width and keep the channel found by the scan.
- Click Save and Save & Apply.
Remove redundant WAN and optionally reuse the WAN port
Removing WAN is optional but the source recommends it for a cleaner configuration:
- Open Network → Interfaces and delete
WANandWAN6. - Open Network → Firewall and delete the
wanrule/zone. - Click Save & Apply.
This also removes redundant firewall traffic and port-forward rules, but it does not turn the WAN port into LAN automatically. To reuse it, open Network → Interfaces → Devices, click Unconfigure for device wan, click Configure... for br-lan, add wan to Bridge ports, and click Save & Apply.
3. Give wwan a static address and test it
Assign an address in the main router's subnet, for example 192.168.1.30, so it can manage the extender and later be used by the Relay bridge:
- Open Network → Interfaces and click Edit for
wwan. - In General Settings, change the protocol to Static Address.
- Enter IP
192.168.1.30, subnet mask255.255.255.0, and gateway192.168.1.1. - In Advanced Settings, enable Use custom DNS Servers and enter
192.168.1.1. - Click Save, then Save & Apply.
Test the uplink before installing the relay protocol:
- Open Network → Diagnostics.
- Choose IPv4 Ping.
- Run the ping and wait for the result.
If the ping fails, fix the uplink first; do not create the bridge while wwan cannot reach the main router.
4. Install the relayd package
- Open System → Software.
- Click Update List and wait for a successful update.
- Enter
luci-proto-relayin Filter. - Click Install.
- Reboot from System → Reboot after installation.
5. Add the Relay bridge
relayd joins the extender's lan and wwan interfaces.
- Open Network → Interfaces.
- Click Add New Interface.
- Name it, for example,
repeater_bridge. - Select Relay bridge as the protocol. If the option is missing, reboot and reopen LuCI.
- Click Create Interface.
- Click Edit for the new
repeater_bridgeinterface. - Confirm that Protocol is Relay bridge.
- Enter the IP assigned to
wwanas Local IPv4 address, for example192.168.1.30. - Select both
lanandwwanunder Relay between networks. - Click Save, then Save & Apply.
- Reboot the extender.
6. Enable the AP for clients
- Open Network → Wireless.
- Click Edit for an SSID with Mode: Master; do not edit the Mode: Client uplink.
- In Interface Configuration, set the SSID, encryption, and password. The source allows reusing the main router's values for simpler roaming, or using a distinct SSID to identify the extender.
- If AP and uplink share a radio, keep the same Operating frequency.
- Click Save.
- Enable the wireless network.
- Other radios, such as b/g/n or n/ac/ax, can be enabled as well.
- Click Save & Apply.
Return the PC to DHCP and connect to the new SSID. The client should receive DHCP from the main router; Status → Overview shows the uplink and AP, while the wwan address is best checked under Network → Interfaces.
7. Equivalent CLI configuration
Enable wireless before scanning:
| |
Scan with the actual interface; the source uses wlan0 as its example:
| |
If the name differs, use ifconfig to identify the wireless interface. Scan output includes SSID, BSSID, frequency, signal, HT information, and encryption. In the source example, Violetta is the Wi‑Fi g network and the BSSID is C8:D5:FE:C8:61:B0.
The source shows this UCI state after configuration:
| |
The OpenWrt SSID in this sample has no encryption, solely to demonstrate the relay bridge. A real deployment must use WPA and replace the SSID, BSSID, and passphrase with the local values.
8. Networking details and the alternative wireless client
Even though clients behind the extender receive DHCP from the main router, the extender's LAN must remain on another subnet because relayd is routing traffic. The extender's Ethernet ports and AP are both on LAN, and relayd forwards them into the main network. The separate LAN subnet (192.168.2.0/24) is then only a management path.
When a shared broadcast domain is not required, a simple wireless client is easier to reason about: wwan receives DHCP, LAN uses a separate subnet, and NAT handles the boundary. That is a different design from relayd; do not merge the two procedures.
9. IPv6 support
The source has a separate IPv6 branch that needs a public prefix from the main router:
- Open Network → Interfaces, create
wwan6with protocol DHCPv6, coveringwwan. - In Common Configuration, set Request IPv6 address to
disabled; select thelan / repeater bridge...firewall line; leave Custom delegated IPv6-prefix empty. - In Interfaces overview, verify that
wwanreceives a public IPv6 address. - Edit LAN. Under DHCP Server → IPv6 Settings, set
RA-Service: relay mode,DHCPv6-Service: disabled, andNDP-Proxy: relay mode. - Edit
wwanand click Setup DHCP Server. Under General Settings enable Ignore interface; under IPv6 Settings set Designated master: checked,RA-Service: relay mode,DHCPv6-Service: disabled, andNDP-Proxy: relay mode. - Click Save, then Save & Apply.
IPv6-enabled clients may receive public addresses derived from the main router's prefix and route through the extender. If IPv6 is not required, keep the services explicitly disabled rather than allowing unintended DHCPv6 behavior.
10. Troubleshooting and known limits
Lost access to the extender
If the extender cannot be reached from the main network, connect a PC by Ethernet to LAN, assign 192.168.2.10/24, and open 192.168.2.1. If a host on 192.168.1.0/24 cannot reach the extender, check that the Relay bridge's Local IPv4 address matches the wwan address.
Check firewall zones
The source says that LuCI normally adjusts the firewall. If behavior is wrong, check that LAN covers lan, repeater_bridge, and wwan, and that redundant WAN/port-forward rules were handled. Do not expand a zone merely to hide a configuration error.
Reported issues
- The AP may not forward DHCP/BOOTP correctly; the source links an issue about relayd not forwarding broadcasts.
- Some MT762x devices have extremely poor upstream transfer speed.
- Clients behind relayd may be unreachable from the other side even while outbound traffic works, due to double-NAT/bridge behavior.
- Not every driver permits AP and STA on the same radio; use another radio or a routed client when this occurs.
- If the upstream SSID, channel, or security changes, the extender may lose its uplink; use the static management path to repair it.
- VLAN-dependent designs may need a Layer 2 GRE (
gretap) tunnel instead of relayd. relaydis an IPv4 bridge-like mechanism, not a guaranteed replacement for WDS/802.11s.- The source mentions
kmod-trelayas another possibility but provides only a source-code link, not a complete installation/configuration procedure; I do not invent one.
11. NAT instead of Relay bridge
For a router-cascade repeater, the source gives a NAT branch whose prerequisite is a router with two initial interfaces, LAN and WAN:
- Open Network → Interfaces, edit LAN, and set a static IPv4 address
192.168.x.1, wherexdiffers from the upstream Wi‑Fi subnet. - Open Network → Wi-Fi, scan, select the network, and click Join Network.
- Enter the Wi‑Fi password, leave Name of new network as
WWAN, choose theWWANorWANfirewall zone, and click Save. - Open Network → Interfaces and edit
wwan. - Open the Firewall tab and click Save and Apply.
- Open Network → Firewall, edit the
wanzone, select bothWANandWWANunder covered networks, then click Save and Apply.
This binds WWAN to WAN and lets LAN reach the Internet. Clients are behind double NAT; do not use this branch when the goal is one subnet or broadcast domain with the main router.
Conclusion
Relayd handles networks where WDS or 802.11s cannot be used, but the trade-offs are a separate management subnet, broadcast/IPv6 limits, and many compatibility conditions. I change LAN to 192.168.2.1, test wwan at 192.168.1.30, install luci-proto-relay, create repeater_bridge, and enable the AP only after the uplink pings successfully. When I control the main router, I prefer WDS or 802.11s; relayd is a last resort with a clear Ethernet recovery path.
Sources
OpenWrt Wiki – Wi-Fi Extender/Repeater with relayd , updated 2025-07-18. This is an independent adaptation retaining the LuCI, CLI, IPv6, and NAT branches and the source's limitations. ↩︎ ↩︎
OpenWrt Wiki video link — linked directly by the source page; the video is not rehosted. ↩︎
 Connect OpenWrt to an upstream Wi‑Fi network …
- Define persistent OpenWrt routes in …
- A complete adaptation of the OpenWrt 802.11s …
- An independent technical adaptation of the …
Góp Ý / Bình Luận / Đánh giá